Cherry Blossom Path Scarf Tips for Cable and Lace Knitting

Cherry Blossom Path Scarf Tips for Cable and Lace Knitting

The Cherry Blossom Path Scarf is a pattern that features cables and lace patterns while worked in our Perfection Worsted yarn. We’ve marked this pattern as Experienced in the skill level, as the pattern does require your attention to the cables and lace stitches! Of course, it’s all just one stitch at a time, so if you’ve knit cables or lace before you can handle this pattern. 

Knit this scarf following the chart or the row-by-row instructions. For those knitters choosing the chart, make sure to first review the legend on page 7; the symbols are shown below. Take a few moments to review the symbols, abbreviations, cables, decreases, and increases. A tip: the designer wrote the pattern for a slip one, knit two, pass slipped stitch over - but if you instead do a slip one, kt2og, pass slipped stitch over, you’ll be off on the next row.

We’ve taken a tip from a previous tutorial blog and added color-coding to the chart, so that is already done for you! Having sticky notes, washi tape, a magnetic chart keeper or stitch markers on hand may be useful, but they are not required. Do what works for you!  

Here’s another tip: knit in good lighting and if you can, avoid needles that are close in color to your yarn. Both points will help with counting if you find you are off somewhere. This isn’t the type of project suited for a movie theater or with the lights out while you stream a show at home.

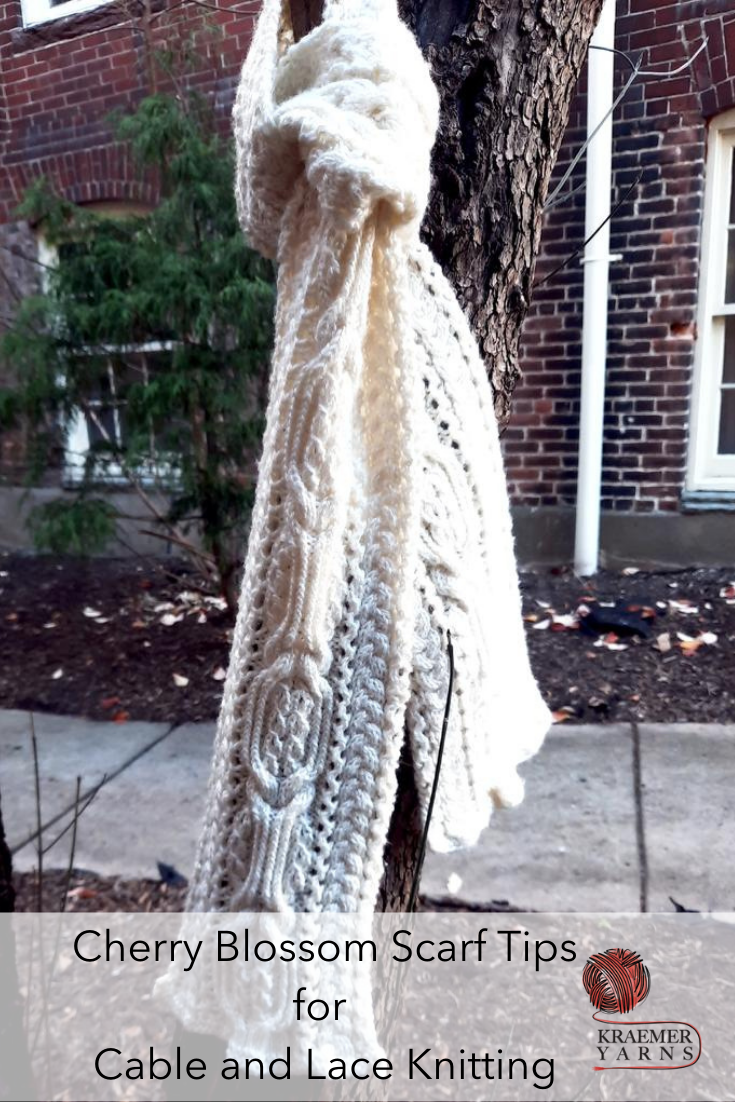
The pattern is a 48-row repeat to obtain the desired scarf length. Don’t let this intimidate you! As you begin to work through the pattern, you’ll notice that certain rows repeat. Such is the nature of cables and lace! As you work your way through, watch how the stitches line up on top of one another and how the cables cross. Stop and admire your work! Are the yarnovers alternating? Are any cables in a column crossing properly? It’s easier to fix when you catch a mistake after a few rows than a few inches! Here’s the scarf with one complete repeat. 

The pattern gives you instructions on how many repeats to work for a standard length scarf, approximately 57”. With one repeat complete, you can take a measurement and have an idea of how many repeats you’ll need to achieve a certain length, if your goal is longer or shorter.

Beth Aidala
Read more
Swatching tips from Kraemer Yarns

Swatching tips from Kraemer Yarns

Swatching can be a divisive topic in the yarn world. There are knitters who always swatch and knitters who never swatch. We’d like to use this blog post today to encourage you to give swatching a chance, and to swatch properly, so that you have the best chance possible of a successful finished object in your favorite Kraemer Yarn that is the size you expect! 


Swatch Big!

While it is tempting to knit a few stitches for a few rows and call it swatching, it’s not enough to get an accurate idea of the gauge that will result from the unique combination of needle + yarn + the way YOU knit. You need at least a 4-inch square as this avoids edge distortions and for you to relax into the knitting process. Also resist the temptation to measure before your swatch is bound-off. In progress swatches won’t be accurate! If you’re concerned that you need to be conservative with your yardage, know that you can always unravel the swatch later if you need it! 

Here is our pre-blocked swatch pile of Mauch Chunky (bottom), Naturals Judy, Tatamy and Perfection Sport


Wash and block your swatch

After you’ve knit your swatch, you’ll want to give it a bath. This step helps relax the stitches, removes dirt or oils your hands may have gotten on to the yarn, and evens everything out. You’ll find it is easier to measure your stitch and row count from a flat fabric too! Follow the directions on the yarn label and consider how you will wash the final garment. We soaked our swatches in Eucalan and tepid water for 15 minutes, gently squeezed out the water, laid them flat and pinned them out, but did not stretch them. 

Clockwise from the top left: Perfection Sport, Tatamy, Naturals Judy, Naturals Judy (We’ll explain why there are two in a moment!), Mauch Chunky, Tatamy Tweed. 

Measure your swatch

To take accurate measurements, you’ll want to use a wooden, metal, or acrylic ruler. Avoid a flexible measuring tape as they can stretch over time! Count the number of stitches within 4 inches of the center of the fabric. This is your stitch gauge over 4 inches. If you need the gauge per 1 inch, divide that stitch count by four. Row gauge measurements are similar, count the number of rows within four inches and if needed, divide by four. 

Your swatch should be large enough so that you can measure your gauge in a few spots! Compare your gauge to that of the pattern - did you meet it? Do you have more or less stitches per inch? If you have more, swatch again with a larger needle. If you have less, swatch again with a smaller needle. 


A note on the Naturals

Kraemer Yarns Naturals are undyed yarns. If you choose to use these yarns, be mindful to wash the yarn first, before dyeing and swatching! Even if you are not dyeing the yarn and will be using it in the undyed state, the yarn should still be washed before you swatch. 

For these swatches of Judy, we cast on 35 stitches and knit with US7 needles. The swatch on the top is straight from the hank, swatched, and blocked. Before knitting the swatch on the bottom, we soaked the yarn to wash it, let it air dry, then swatched and blocked.

Gauge

Unwashed Yarn

Washed Yarn

After Blocking

20 st / 4 inches

19.5 st / 4 inches

The difference of half a stitch may not seem like much but it does add up!

Save your swatch

When your project is complete, saving the swatch is a good idea as you’ll have a bit of yarn available should any repairs be needed if there’s a snag in the future! Over time, you could also consider combining your swatches into a one-of-a-kind blanket, or swatch shrug like Vickie Howell recently shared. 

Remember, multiple knitters do not knit exactly the same and the individual differences result in different gauges. Knowing how the yarn works up when you use it is what is important! If the same knitter were to knit these swatches again in a few months, it is possible their gauge would be different, given how tense or relaxed they are when knitting.  


Your future self will thank you for taking the time now to learn all you can about the fabric you’ll create.


Beth Aidala
Read more
Fixing a Brioche Mistake in the Cozy Countess Brioche Cape

Fixing a Brioche Mistake in the Cozy Countess Brioche Cape

Sometimes, when you get in the rhythm of knitting and are contentedly working along, you miss a stitch. Mistakes happen and we understand that awful feeling when you notice it.

Take a look at this Cozy Countess Brioche Cape we have in progress. From the right side, it’s hard to spot the mistake. - in the photo above, the arrow is pointed at the dropped stitch. 

But on the inside, it’s quite obvious, as you can see in the above photo. Fixing a mistake in your brioche is a little more nerve wracking than fixing a mistake in garter or stockinette fabric. The first thing you should do is stay calm. Don’t panic! It can be fixed, so take a deep breath, put the project to the side, and have a tea and cookie break. Maybe even put it down for the day and return the next day, refreshed and ready to make the corrections.   

Correcting a Brioche Mistake

The good news is that you can redo the brioche without having to rip out all of your hard work because we can focus on just the section that needs attention. Notice how the fabric looks like columns of knit stitches; that is where we are going to begin the repair work. If you’ve ever dropped down to fix a miscrossed cable or to catch an unintentionally dropped stitch, this will seem familiar to you. 

Work your way across the round until you reach the column with the stitch that needs to be reworked. Turn the work as needed so the column is on the outside, facing you. You may find it reassuring to use a locking stitch marker to hold an adjacent stitch pair so that wrapped stitch doesn’t drop, creating another opportunity for practicing this repair! 

Drop the first stitch of that column off the needle, then drop it through each row below it, until you get to the problem stitch. Take your time! A crochet hook can assist easing the stitches through. When you use a 100% wool yarn, like Naturally Nazareth, the stitches grab each other, so you may need to do a little coaxing here. 

Put that live stitch on the crochet hook. In this project, it is our lighter color grey yarn. Position the hook to go over the first strand of the darker color (red) yarn, which you will see is right at the back of the stitch, then under the next two red strands. Grab the next strand of grey, and pull it back under those two red strands, over one red strand and up through the live stitch. There you go! One stitch is repaired! 

Repeat this “over one, under two” as you fix each stitch, all the way up the column.  

That’s it! After you take a moment to admire your awesome achievement, don’t forget to turn the work back so the proper side is facing you as you continue with the knitting. 

Remember, mistakes are opportunities to learn something new and build your skill set! Let us know how it works for you and that you’ve had success, you can find us on Facebook, Instagram, and Ravelry

Don’t forget to pin this post!

Beth Aidala
Read more
Left Continue shopping
Your Order

You have no items in your cart